In my previous article, I showed you how I managed to reverse-engineer an application to find its API. Now, I want to use this API through a script and a small frontend app. And I encountered a problem that every frontend developer has faced in their career: the infamous CORS issue.
Proud of having succeeded in finding the schema of my API and understanding how it works, I started coding my serverless stack to create my little script. Then I thought a graphical interface would be cool indeed. I made my first pages, and occasionally, I needed the raw data from the API without processing it, so I called the API directly, but then I received this error:

CORS Mechanics
- $1
- $1
- $1
- $1
- $1
CORS is essential for web security. It protects users from malicious attacks such as CSRF (Cross-Site Request Forgery) and ensures that sensitive data cannot be shared across domains without explicit permission. At the same time, it allows developers to build rich and interactive web applications that integrate resources from multiple origins
— —
So ?
As you’ve gathered, CORS issues arise from the browser, which is why I don’t face this problem with my script running on a server. In my case, since I don’t own the API, I can’t add the missing headers myself. To bypass this issue, I will use a well-known AWS service: API Gateway. API Gateway will act as a proxy, which is very quick to set up (1–2 minutes) and will be free in my case.
Here’s the idea:

As we can see in this setup, where the API acts as a proxy, when our browser responds to the HTTP OPTIONS call, it’s our API Gateway that will respond. In the configuration, I will allow all origins. However, if my browser makes a call to the real API, the API Gateway will simply forward the call to the real API, which will then respond. And there are no CORS issues in this case; remember, it’s only browsers that initiate OPTIONS calls. Once my API Gateway has received the response, it transfers the response back to the browser.
I will describe how to easily create this API through the console, and I will include the Terraform code at the end.
- $1
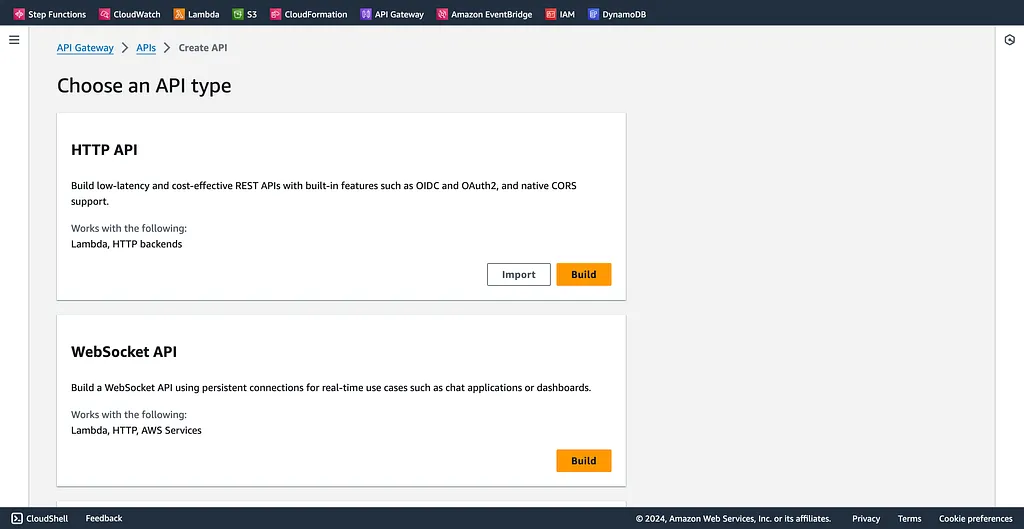
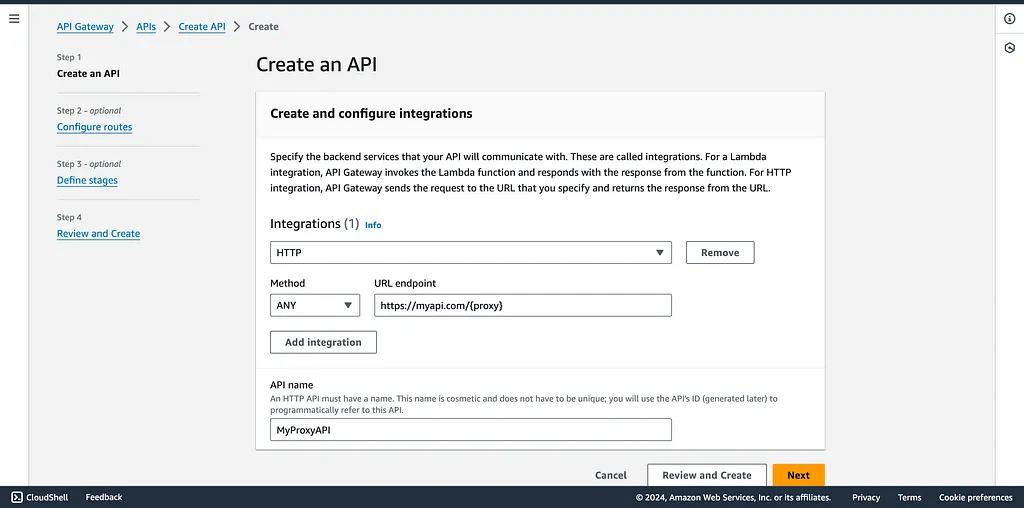
- We create our HTTP integration
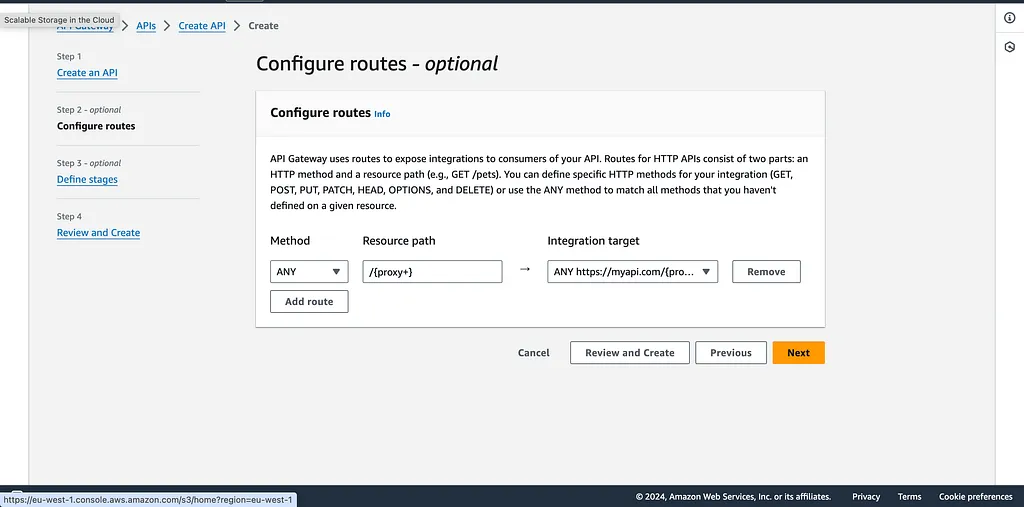
- We establish a catch-all Proxy+ route, configured to intercept and forward all incoming requests.
-
We can click on create API.
-
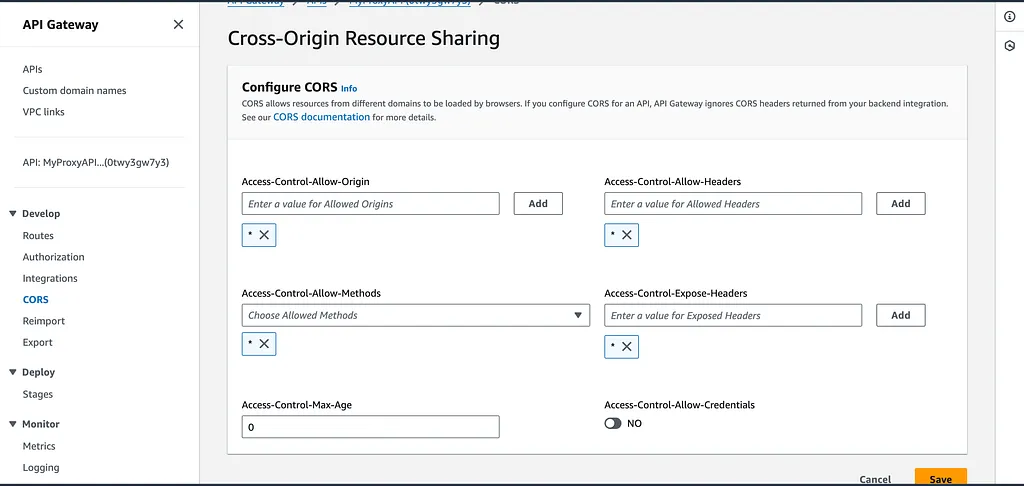
Then we activate the CORS (do not forget to click on add and then save). Check by returning to the page.
And there you have it, we just have to call our API Gateway endpoint with our routes from our frontend application!
And there is the terraform code :
provider "aws" {
  region = "us-east-1"
}

resource "aws_apigatewayv2_api" "my_http_api" {
  name          = "my-http-api"
  protocol_type = "HTTP"

  cors_configuration {
    allow_origins = ["*"]
    allow_methods = ["*"]
    allow_headers = ["*"]
    allow_credentials = false
  }
}

resource "aws_apigatewayv2_integration" "my_integration" {
  api_id           = aws_apigatewayv2_api.my_http_api.id
  integration_type = "HTTP_PROXY"
  integration_uri  = "https://myapi.com" # Replace with your API URL
  integration_method = "ANY"
}

resource "aws_apigatewayv2_route" "my_route" {
  api_id    = aws_apigatewayv2_api.my_http_api.id
  route_key = "ANY /{proxy+}" # This sets up a catch-all route
  target    = aws_apigatewayv2_integration.my_integration.id
}

resource "aws_apigatewayv2_stage" "my_stage" {
  api_id      = aws_apigatewayv2_api.my_http_api.id
  name        = "default"
  auto_deploy = true
}